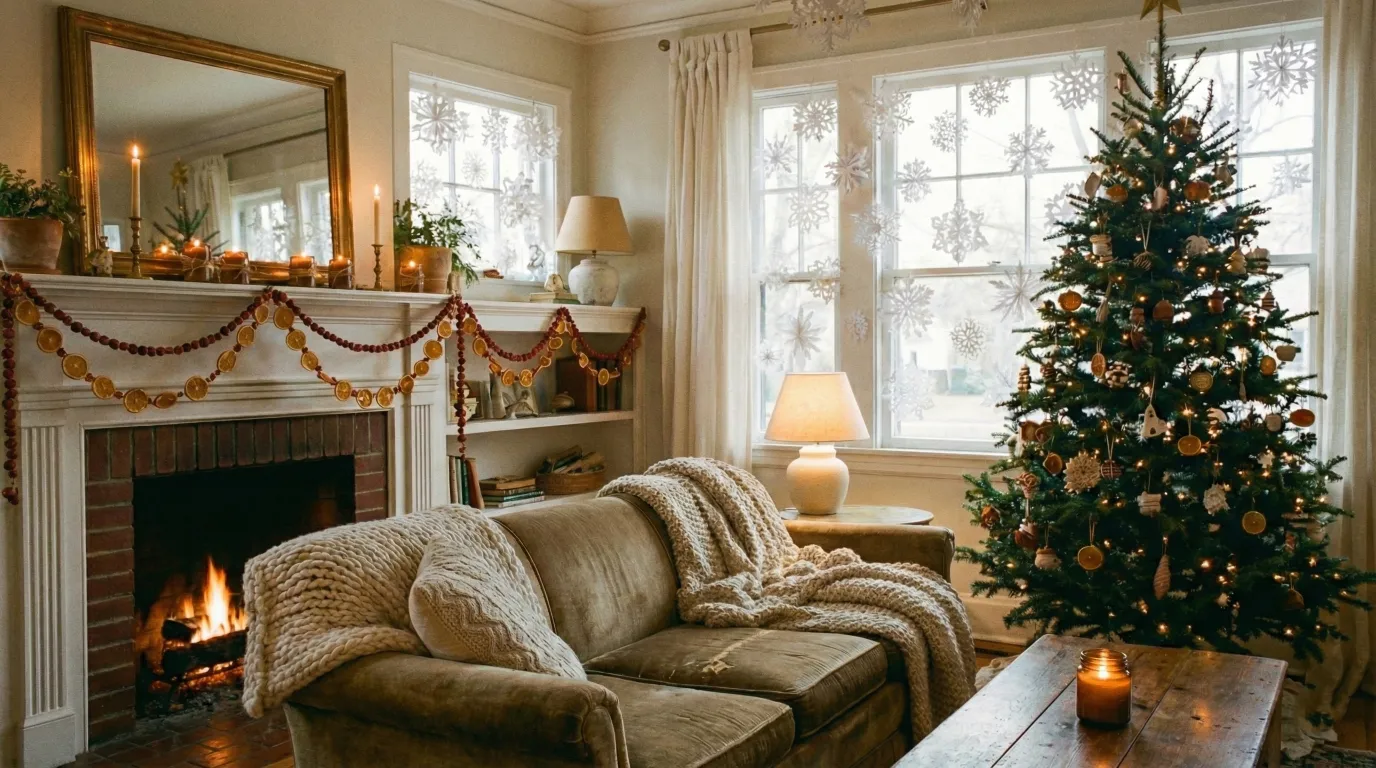
There’s something truly special about decorating your home for Christmas. It’s not just about the sparkle, the lights, or the scent of pine. The real magic comes from creating a space filled with warmth, comfort, and personal meaning. DIY decorations add a personal touch that store-bought décor simply can’t match. They tell your story. They reflect your unique style. Most importantly, they make your home feel uniquely yours during the most magical season of the year.
Whether you’re dreaming of a calm, neutral winter wonderland or a classic Christmas atmosphere, these simple DIY projects will help you transform any room into a cozy holiday sanctuary. Each project is beginner-friendly, budget-conscious, and perfect for families, craft lovers, or anyone wanting to make this Christmas feel extra intentional. You don’t need expensive materials or advanced crafting skills. With basic supplies and a little creativity, you can create decorations that rival anything you’d find in high-end stores.
This comprehensive guide covers ten beautiful DIY Christmas decoration ideas that range from quick ten-minute projects to more involved crafts. We’ll explore everything from delicate paper snowflakes to fragrant cinnamon stick candle wraps, from elegant dried orange garlands to minimalist wood bead ornaments. Each project includes detailed instructions, placement suggestions, and tips for personalization. Let’s fill your home with beauty, together.
Why Choose DIY Christmas Decorations Over Store-Bought Options
Creating your own Christmas decorations offers numerous advantages beyond simple cost savings. When you make decorations yourself, you gain complete control over the materials, colors, and style. This means you can perfectly match your existing home décor, whether you prefer minimalist Scandinavian aesthetics or traditional holiday charm. DIY projects also allow you to use natural, eco-friendly materials that align with your values.
Beyond practical benefits, handmade decorations carry emotional significance. Each piece becomes a memory of the time you spent creating it. Whether you craft alone as a peaceful moment of reflection or with family as a bonding activity, these decorations tell a story. They become part of your holiday traditions, passed down through generations or simply cherished as reminders of special moments.
From a budget perspective, DIY Christmas decorations typically cost a fraction of store-bought alternatives. Most projects in this guide require materials you may already have at home or can purchase for under ten dollars. This makes it possible to completely transform your space without breaking the bank. You can create multiple decorations for the price of a single store-bought item.
Finally, DIY decorations offer unmatched versatility. You can adjust sizes, colors, and styles to fit your specific space and preferences. If a project doesn’t work perfectly the first time, you can easily modify it or start over without significant financial loss. This freedom encourages experimentation and helps you develop your personal decorating style.
Essential Materials and Tools for DIY Christmas Decorations
Before diving into specific projects, it’s helpful to understand the basic materials and tools you’ll need. Most DIY Christmas decorations require simple supplies that are easy to find at craft stores, dollar stores, or even your local grocery store. Having these basics on hand will make your crafting process smoother and more enjoyable.
Paper is one of the most versatile materials for Christmas DIY projects. You’ll want to stock up on white cardstock for structural projects like paper trees and snowflakes. Construction paper in various colors works well for colorful accents. For more delicate projects, consider tissue paper or origami paper. These materials are inexpensive and come in large quantities, making them perfect for creating multiple decorations. According to Martha Stewart’s crafting guidelines, paper-based decorations are among the most accessible and versatile holiday projects.
Natural materials add warmth and authenticity to DIY Christmas decorations. Cinnamon sticks, dried oranges, eucalyptus branches, and pinecones are all readily available and relatively inexpensive. These elements bring texture, scent, and organic beauty to your projects. You can often find them at farmers markets, craft stores, or even in your own backyard.
Basic crafting tools will make your projects easier and more professional-looking. A good pair of scissors is essential for cutting paper and fabric. A hot glue gun provides strong, quick bonds for most materials. Twine, ribbon, and string are crucial for hanging decorations and adding finishing touches. LED candles or fairy lights add magical illumination without fire risk.
Don’t forget about containers and bases for your decorations. Mason jars work beautifully for lanterns and potpourri displays. Wooden beads can be found at craft stores and work for multiple projects. Frames, whether new or thrifted, can transform simple materials into elegant wall art. With these basics, you’re ready to tackle any project in this guide.
3D Paper Snowflakes: A 10-Minute DIY Project
These delicate, sculptural snowflakes make any room feel like a peaceful winter retreat. Unlike traditional flat paper snowflakes, 3D versions add depth and dimension that catch light beautifully throughout the day. They’re incredibly easy to make, requiring only paper, scissors, and a stapler or glue. Even children can help with this project, making it perfect for family crafting sessions.
The beauty of 3D paper snowflakes lies in their simplicity and elegance. They bring softness to your décor without overwhelming the space. When hung in front of windows, they catch morning light and create dancing shadows throughout the day. Their white color works with any color scheme, from traditional red and green to modern neutral palettes.

To create these snowflakes, start by cutting six identical squares of white paper. Fold each square diagonally to create a triangle, then fold it two more times to create a smaller triangle. Cut patterns along the edges, similar to traditional snowflake cutting, but keep the cuts relatively simple for the 3D effect to work properly. Unfold each piece to reveal your snowflake pattern.
Once you have six identical snowflake pieces, you’ll connect them at their centers. Fold each snowflake in half lengthwise, then attach three pieces together along their folded edges. Repeat with the remaining three pieces. Finally, connect the two halves together at their centers, creating a three-dimensional star shape. The result is a stunning snowflake that appears to float in space.
Where to Display Your 3D Paper Snowflakes
These snowflakes work beautifully in multiple locations throughout your home. Hang them in front of windows to catch morning light and create beautiful shadow patterns on your walls. Create a “snowfall wall” above your sofa or fireplace by hanging several at varying heights. This creates visual interest and draws the eye upward, making your space feel more dynamic.
For children’s rooms, suspend several snowflakes over the bed for a dreamy winter look. Use fishing line or clear thread to make them appear to float. In your entryway, a few strategically placed snowflakes create magical first impressions for guests. You can also hang them from ceiling hooks in dining areas for an elegant, festive atmosphere during holiday meals.
The key to displaying 3D paper snowflakes effectively is variation. Mix different sizes and hang them at different heights to create visual depth. Consider grouping them in odd numbers, which tends to look more natural and balanced. Don’t overcrowd the space,sometimes fewer, well-placed snowflakes create more impact than many crowded together.
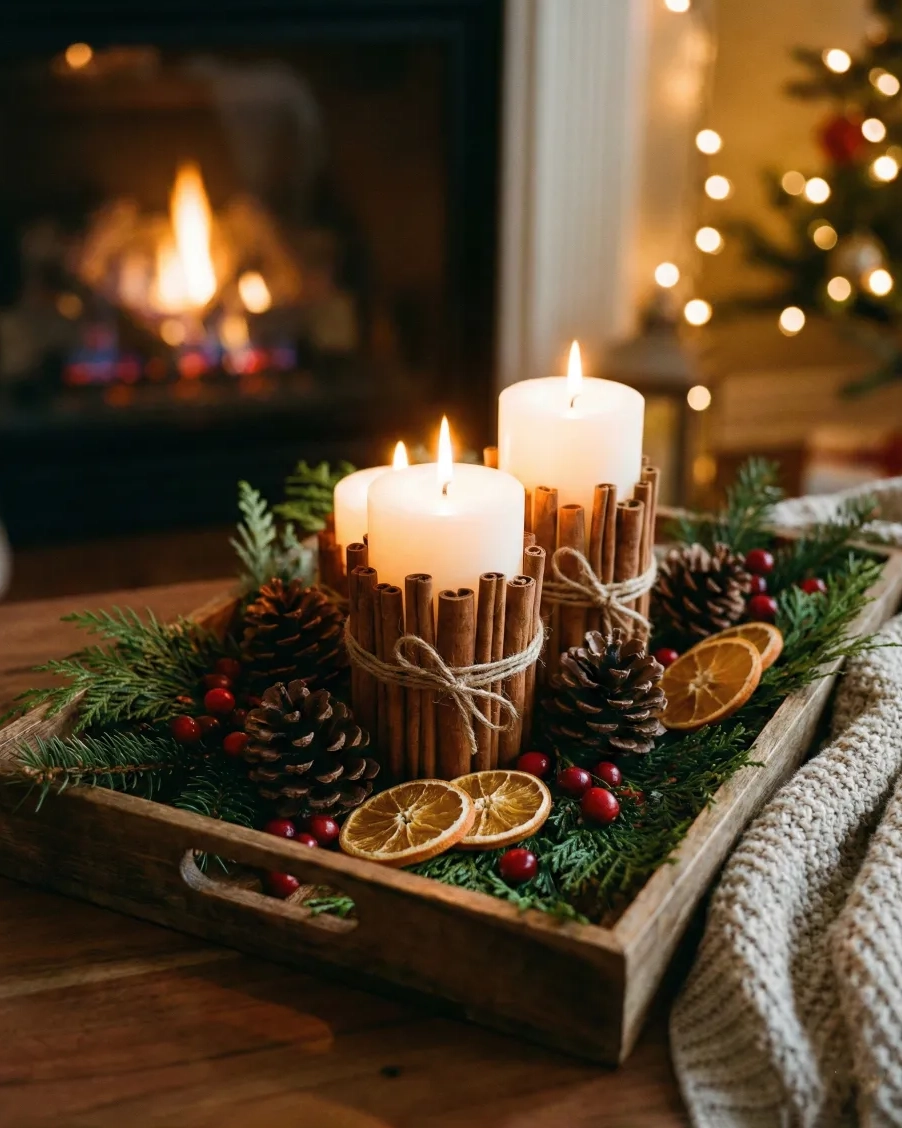
Cinnamon Stick Candle Wraps: Fragrant Holiday Ambiance
These candle wraps smell like Christmas morning and look handcrafted, warm, and luxurious. Cinnamon adds a natural, rustic touch while filling your home with a comforting holiday scent that can’t be replicated by artificial fragrances. The project requires minimal materials: cinnamon sticks, twine or ribbon, and candles. You can complete several wraps in under thirty minutes.
The natural beauty of cinnamon sticks creates an organic, earthy aesthetic that works with both traditional and modern décor styles. Their warm brown color complements neutral palettes beautifully while adding texture and visual interest. Unlike scented candles that may contain synthetic fragrances, cinnamon sticks provide natural, subtle scent that enhances rather than overwhelms your space.
To create cinnamon stick candle wraps, start by selecting candles that are slightly shorter than your cinnamon sticks. This ensures the sticks extend beyond the candle, creating a more polished look. Measure the circumference of your candle and gather enough cinnamon sticks to wrap around it completely. You’ll want them to fit snugly but not so tight that they’re difficult to secure.
Arrange the cinnamon sticks around your candle, ensuring they’re all facing the same direction for a uniform appearance. Use twine or ribbon to secure them in place. Wrap the twine around the middle of the sticks several times, then tie it securely. You can add a decorative bow or leave it simple, depending on your style preference. For extra security, you can add a small dot of hot glue between sticks before wrapping.
Perfect Placement for Cinnamon Stick Candles
These candles work beautifully in multiple rooms throughout your home. Place them on a wooden tray in your living room for an instant cozy centerpiece. The combination of wood, cinnamon, and candlelight creates a warm, inviting atmosphere perfect for holiday gatherings. On your dinner table, they serve as an elegant centerpiece that adds fragrance without competing with food aromas.
In bathrooms, cinnamon stick candles create a spa-like moment that feels luxurious and seasonal. The natural scent helps neutralize odors while adding holiday cheer. On bedside tables, they provide a soft, seasonal glow perfect for evening reading or relaxation. The gentle fragrance can even help promote better sleep during the busy holiday season.
For small spaces without fireplaces, these candles can serve as a fireplace alternative. Group several together on a mantel or console table to create a focal point. The combination of multiple candles creates more visual impact and fills larger spaces with fragrance. Consider varying the heights of your candles for added visual interest.
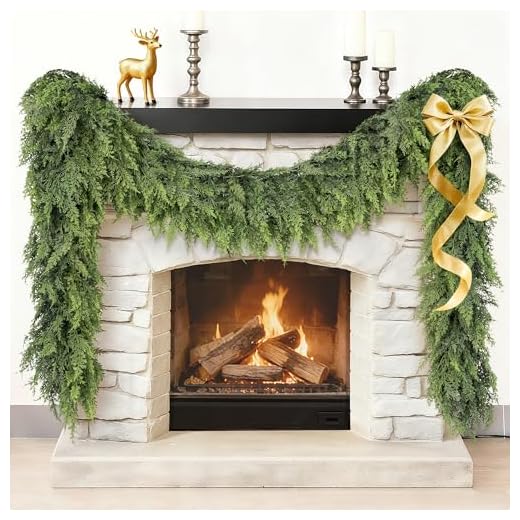
Dried Orange and Eucalyptus Garland: A Timeless Classic
This garland represents a timeless, cozy classic that’s warm, fragrant, and visually stunning. Dried oranges add a pop of amber glow, especially when paired with greenery or twinkle lights. The combination of citrus and eucalyptus creates a sophisticated, natural aesthetic that works with both traditional and modern décor styles. This project requires some advance planning, as the oranges need time to dry, but the result is well worth the wait.
The process of drying oranges is surprisingly simple and meditative. Slice oranges thinly and evenly, then bake them at a low temperature for several hours. The slow drying process preserves their beautiful color while removing moisture. The result is a translucent, amber-colored slice that catches light beautifully and maintains its shape for months. The Better Homes & Gardens method recommends baking at 200°F for 2-3 hours for optimal results.

To create your garland, start by threading dried orange slices and eucalyptus branches onto a length of twine or floral wire. Alternate between oranges and greenery to create visual rhythm. You can add other elements like cinnamon sticks, pinecones, or small ornaments for additional texture and interest. The key is maintaining balance,too many elements can look cluttered, while too few may lack impact.
When stringing your garland, leave some space between elements to allow each piece to be appreciated individually. This also makes the garland more flexible and easier to drape. Consider the length of your display area and create your garland accordingly. It’s better to make it slightly longer than needed, as you can always adjust or create additional shorter garlands from extra materials.
Creative Ways to Display Your Dried Orange Garland
This garland works beautifully in traditional locations like along your mantel, where it can be the star of your holiday décor. Drape it on a staircase rail for an elegant, welcoming touch that guests will notice immediately. The combination of natural materials and warm lighting creates an inviting atmosphere that says “welcome home” in the most beautiful way.
For bedrooms, consider using the garland as a headboard decoration. This creates a romantic, cozy atmosphere perfect for the holiday season. In kitchens, drape it across windows where it can catch natural light during the day and twinkle lights in the evening. The combination of citrus and greenery brings freshness to the space while maintaining holiday warmth.
Over mirrors, the garland creates a holiday makeover that reflects light and adds depth to your space. The amber tones of dried oranges complement most mirror frames beautifully. You can also use shorter sections of garland to frame doorways or windows, creating a cohesive holiday theme throughout your home without overwhelming any single space.
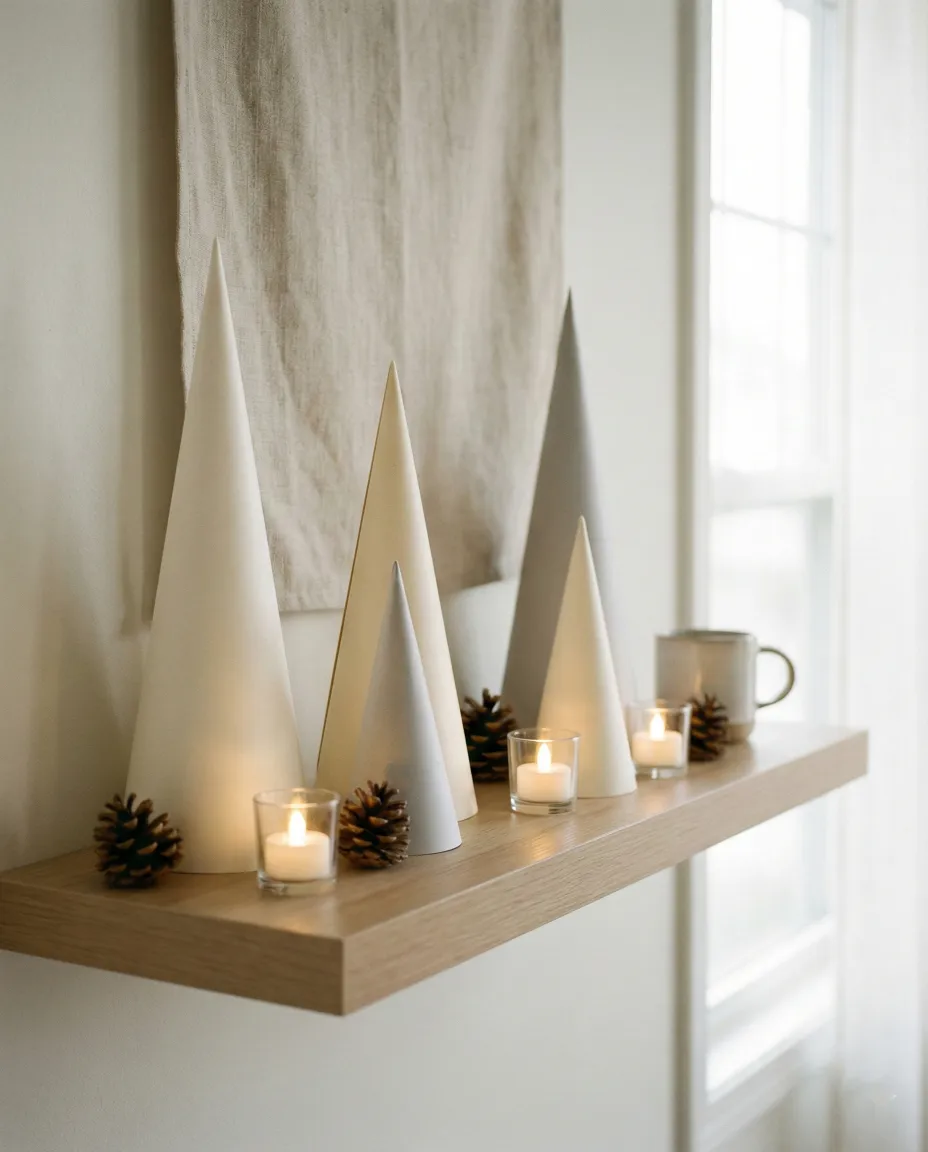
Minimalist Paper Tree Forest: Scandinavian-Inspired Elegance
This simple, modern project is perfect for neutral holiday styling and instantly elevates your décor with a Scandinavian touch. The beauty of paper trees lies in their simplicity,they require minimal materials and can be created in various sizes to suit your space. Unlike traditional Christmas trees, these paper versions work beautifully in small spaces and can be displayed in groups for maximum impact.
The minimalist aesthetic of paper trees appeals to those who prefer clean lines and subtle holiday décor. They add festive cheer without overwhelming your existing design scheme. Their neutral color palette works with any style, from modern minimalist to rustic farmhouse. You can customize them with different paper colors or patterns to match your specific preferences.
To create paper trees, start by cutting cone shapes from cardstock or construction paper. The size depends on your preference, but starting with a base diameter of three to four inches works well for tabletop displays. Roll the paper into a cone shape and secure it with glue or tape. For added stability, you can create a small base from cardboard or use a wooden bead as a stand.
Once you have your basic cone shape, you can add decorative elements if desired. Some people prefer to leave them plain for maximum minimalism, while others add simple patterns or textures. You can create multiple trees in varying heights to create visual interest. The key is maintaining simplicity,too many decorative elements can detract from the clean, modern aesthetic.
Styling Your Paper Tree Forest
These trees work beautifully on shelves with small LED candles, creating a cozy, illuminated display. The combination of paper and candlelight creates soft, warm shadows that add depth to your décor. As a centerpiece on your dining table, they provide height and interest without blocking conversation or views across the table.
On console tables, paper trees can be paired with pinecones and other natural elements for a cohesive, nature-inspired display. Along your fireplace mantel, varying heights create visual rhythm and draw the eye along the length of the mantel. You can mix paper trees with other decorations or let them stand alone for maximum minimalist impact.
For a truly Scandinavian look, keep your color palette neutral. White, cream, and light gray papers work beautifully together. Add natural elements like wood, stone, or greenery to complement the paper trees. The goal is creating a calm, peaceful atmosphere that feels festive without being overwhelming.
Wood Bead Ornaments: Timeless and Customizable
These ornaments are timeless, natural, and endlessly customizable. Wood beads create a minimalist, earthy Christmas feel that’s perfect for neutral homes. Unlike traditional glass ornaments, wood beads are durable, making them ideal for homes with children or pets. They’re also incredibly versatile,you can use them in multiple ways throughout your holiday décor.
The natural beauty of wood beads adds warmth and texture to your Christmas tree and other decorations. Their neutral color works with any color scheme, while their organic shape creates visual interest. You can leave them natural for a rustic look or paint them for a more colorful, playful aesthetic. The choice depends entirely on your personal style and existing décor.
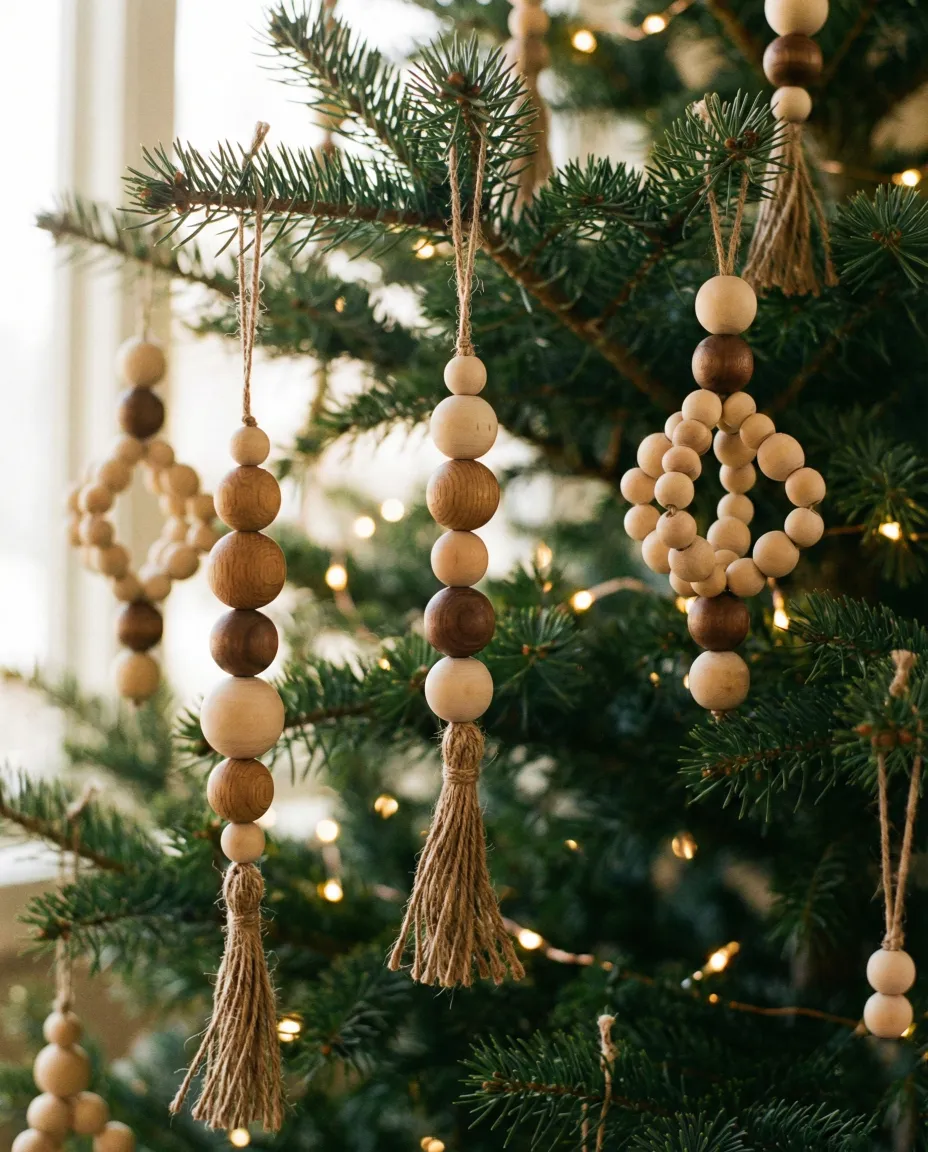
Creating wood bead ornaments is simple and requires minimal supplies. You’ll need wood beads in various sizes, twine or ribbon for hanging, and optional decorative elements like paint or markers. Thread the beads onto twine in patterns that appeal to you. You can create simple single-bead ornaments or more complex multi-bead designs. The key is maintaining balance and ensuring each ornament has a secure loop for hanging.
For added interest, consider mixing bead sizes within a single ornament. You can also add small decorative elements like small pinecones, dried orange slices, or fabric scraps. The goal is creating ornaments that feel personal and handmade while maintaining a cohesive overall look. Don’t worry about perfection,slight variations add character and charm.

Creative Uses for Wood Bead Ornaments
While these ornaments work beautifully on your main Christmas tree, they’re also perfect for other locations throughout your home. Hang them on cabinet handles for a subtle festive touch that doesn’t require major decorating effort. Attach them to gift tags for a cohesive, handmade look that extends your décor theme to your presents.
Clustered in a bowl, wood bead ornaments create a coffee-table décor moment that’s both decorative and interactive. Guests can pick them up and examine them, making them conversation starters. You can also use them to create garlands by stringing multiple ornaments together, perfect for mantels, doorways, or stair rails.
For a modern, minimalist look, create ornaments in neutral tones and display them against a simple background. For a more playful aesthetic, paint them in various colors or add patterns. The versatility of wood beads means you can create a completely unique look that reflects your personal style.
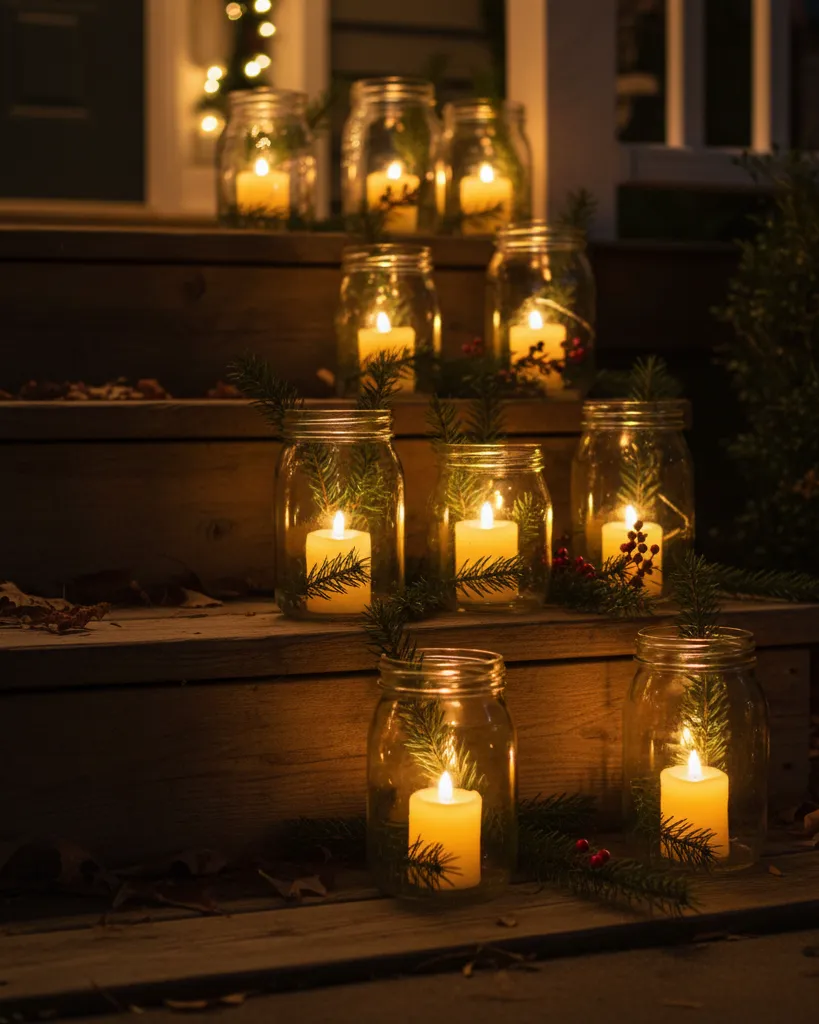
Cozy Mason Jar Lanterns: Rustic Winter Glow
These lanterns provide a soft, rustic glow that warms any winter evening. They’re incredibly versatile, looking beautiful alone or in groups and working in any room of the house. Mason jars are inexpensive and readily available, making this one of the most budget-friendly projects in this guide. The combination of glass, light, and natural elements creates a magical atmosphere that’s perfect for the holiday season.
The beauty of mason jar lanterns lies in their simplicity and adaptability. You can customize them with various fillings, from simple LED candles to more elaborate displays with greenery, pinecones, or other natural elements. The glass allows light to shine through beautifully while protecting the flame or LED from wind and weather. This makes them perfect for both indoor and outdoor use.
To create mason jar lanterns, start by selecting jars in sizes that work for your intended display locations. Wide-mouth jars are easier to fill and decorate, while taller jars work better for certain displays. Clean your jars thoroughly to ensure maximum light transmission. You can leave them clear for maximum light or add a light frosted effect using spray paint or etching cream.
Fill your jars with elements that complement your décor style. For a simple, elegant look, place an LED candle inside with nothing else. For more elaborate displays, add layers of materials like sand or salt at the bottom, then greenery, pinecones, or other natural elements. The key is creating visual interest while allowing light to shine through effectively.


Where to Place Your Mason Jar Lanterns
On your porch steps, these lanterns create a holiday welcome that’s both beautiful and functional. They provide light for guests while adding festive cheer. Group several together for maximum impact, varying heights if possible. The warm glow creates an inviting atmosphere that says “welcome” before guests even reach your door.
On your dining table, mason jar lanterns with greenery create a cozy centerpiece that doesn’t block conversation. The soft light enhances meals without being overwhelming. In windowsills, they create beautiful displays that can be seen from both inside and outside your home. This extends your holiday décor beyond your interior spaces.
For bathrooms, place lanterns on the bathtub ledge for a cozy spa night that feels luxurious and seasonal. The combination of warm light and natural elements creates a relaxing atmosphere perfect for unwinding during the busy holiday season. As a fireplace alternative for small spaces, group several lanterns together to create a focal point that provides both light and visual interest.
Ribbon Wall Hanger: Minimal and Elegant
This minimal, elegant design serves as a perfect alternative to a traditional wreath. It brings movement and softness into your décor for a calm, airy look that works beautifully in modern and traditional spaces alike. Unlike wreaths that can feel heavy or overwhelming, ribbon wall hangers provide festive cheer without dominating your space. They’re also incredibly quick to create, making them perfect for last-minute decorating.
The beauty of ribbon wall hangers lies in their simplicity and versatility. You can customize them with any ribbon color or pattern that matches your décor. They work with various styles, from minimalist to traditional, depending on your ribbon choice. The flowing nature of ribbon adds movement and softness that static decorations can’t provide.
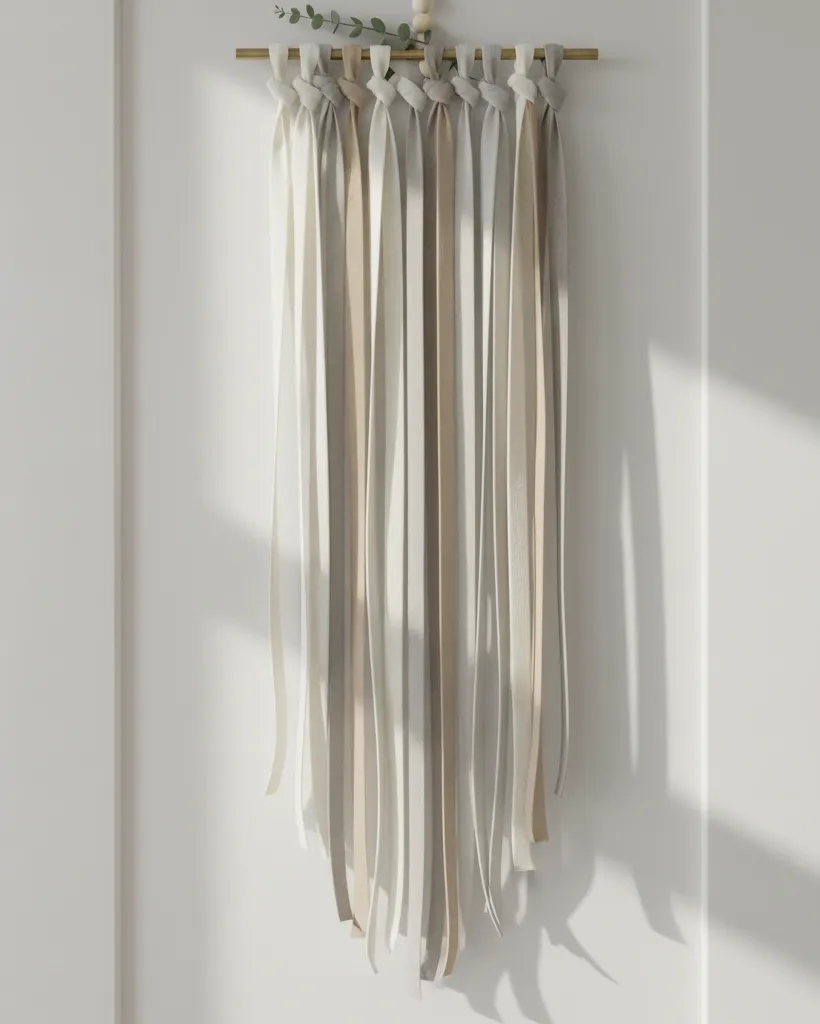
To create a ribbon wall hanger, start by selecting a piece of wood, metal, or even a sturdy branch as your base. The length depends on your intended display location, but most work well at twelve to eighteen inches. Choose ribbons in colors and patterns that complement your existing décor. You’ll want several lengths of ribbon, varying widths for visual interest.
Attach your ribbons to the base using glue, staples, or small nails, depending on your base material. Vary the lengths of your ribbons to create visual movement and interest. You can create a symmetrical design with ribbons of equal length on each side, or an asymmetrical design with varying lengths. The choice depends on your personal style and the look you want to achieve.
Display Ideas for Ribbon Wall Hangers
On your front door, a ribbon wall hanger creates a welcoming first impression that’s both modern and festive. It’s lighter than a traditional wreath, making it easier to hang and less likely to damage your door. The flowing ribbons move gently in the breeze, adding life and movement to your entryway.
On bedroom doors, these hangers add subtle festive cheer without overwhelming personal spaces. They’re perfect for homes where you want holiday décor throughout but don’t want every room to feel like a Christmas explosion. Above your entryway table, they create height and interest without taking up valuable surface space.
On gallery walls, ribbon wall hangers can be incorporated into your existing art displays for a curated holiday feel. They add texture and movement to static wall arrangements. You can even create multiple hangers in coordinating colors and hang them together for a more dramatic effect.
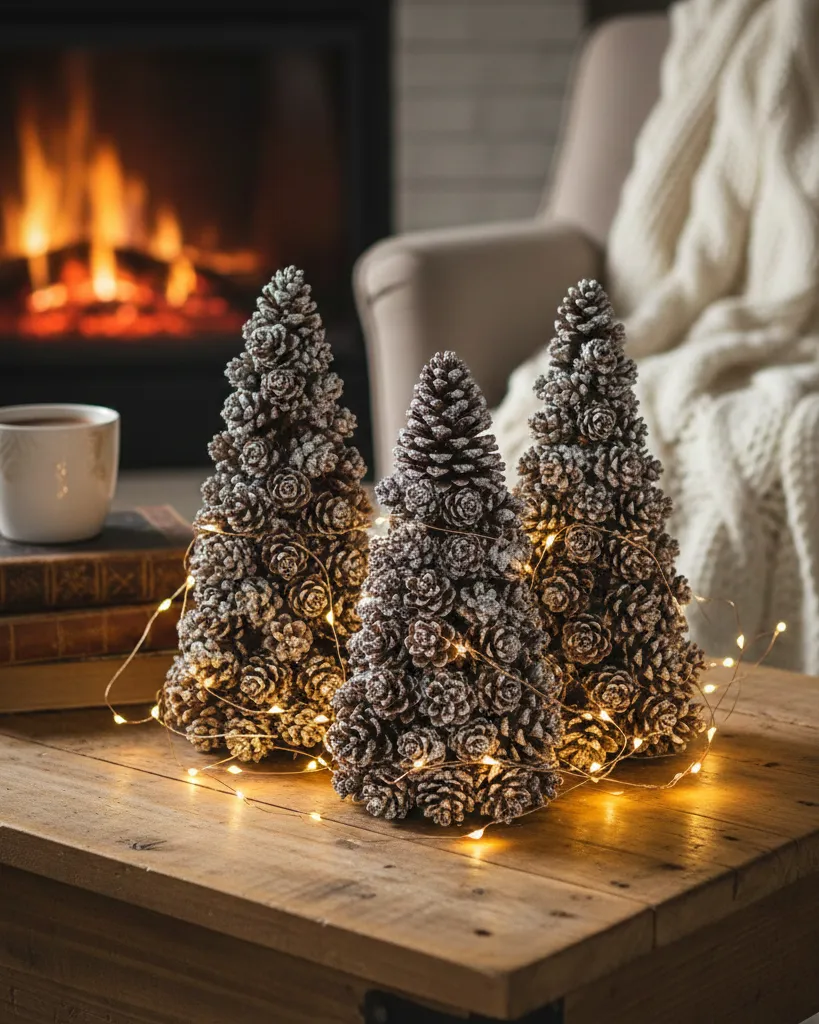
Mini Pinecone Christmas Trees: Adorable and Cozy
These little “trees” are adorable and cozy, perfect for tablescapes and shelves. They’re a charming nod to nature that requires almost no skill to create, making them perfect for crafters of all ages. Pinecones are readily available in most areas, either from your own yard or from craft stores. Their natural beauty and texture add warmth and organic charm to any space.
The appeal of mini pinecone trees lies in their simplicity and natural beauty. They bring the outdoors inside in a way that feels authentic and cozy. Unlike artificial trees, these natural elements have subtle variations that make each one unique. They’re also incredibly durable and can be stored and reused for multiple seasons.
To create mini pinecone trees, start by selecting pinecones in sizes that work for your intended display. You’ll want them to stand upright, so choose pinecones with relatively flat bottoms or create a base using clay, wood, or other materials. Once you have your base, you can leave the pinecone natural or add decorative elements like small ornaments, glitter, or paint.
For a more tree-like appearance, you can add small branches or greenery to the top of your pinecone. This creates a more traditional tree shape while maintaining the natural, organic aesthetic. You can also create stands for your trees using wood slices, small pots, or other bases that complement your décor style.


Perfect Spots for Mini Pinecone Trees
On coffee tables, group three mini pinecone trees together for a balanced, visually appealing display. The rule of three creates natural harmony that’s pleasing to the eye. Add fairy lights or small LED candles nearby to enhance the cozy atmosphere. The combination of natural elements and warm light creates a perfect holiday ambiance.
On mantels, mini pinecone trees work beautifully with fairy lights, creating a magical, illuminated display. Vary the sizes and heights of your trees for visual interest. In kids’ rooms, these trees serve as mini tree décor that’s safe and appropriate for children. They’re also perfect for small spaces where a full-size tree isn’t practical.
On bookcases, mini pinecone trees add subtle festive touches without overwhelming your existing displays. They can be tucked among books or placed on empty shelves for a natural, organic holiday look. The key is maintaining balance,too many trees can look cluttered, while one or two strategically placed trees add just the right amount of holiday cheer.
Framed Gift Wrap Art: Stylish and Inexpensive
This project is stylish, fast, and unbelievably inexpensive. With just a few frames and beautiful wrapping paper, you can turn any wall into a curated holiday gallery. The concept is simple: frame pieces of attractive wrapping paper to create instant art that’s both festive and sophisticated. This project requires minimal skill and can be completed in under an hour, making it perfect for busy holiday schedules.
The beauty of framed gift wrap art lies in its versatility and ease of customization. You can choose wrapping paper that matches your existing décor perfectly, creating a cohesive look throughout your home. Unlike traditional art, you can change these displays each year or even each season, keeping your décor fresh and interesting. The frames can be reused with different papers, making this an incredibly sustainable decorating option.
To create framed gift wrap art, start by selecting wrapping paper that appeals to you. Look for papers with interesting patterns, colors, or textures that complement your existing décor. You don’t need to buy expensive paper,many beautiful options are available at dollar stores or discount retailers. The key is choosing papers that work together when displayed as a group.
Select frames that complement your style and the papers you’ve chosen. You can use matching frames for a cohesive gallery look or mix frame styles for a more eclectic appearance. Thrift stores are excellent sources for inexpensive frames that can be painted or left as-is. Measure your frames and cut your wrapping paper to fit, ensuring patterns are centered and straight.
Display Locations for Framed Gift Wrap Art
Above your sofa, framed gift wrap art creates a festive focal point that’s both decorative and conversation-starting. Group several frames together for maximum impact, varying sizes if possible. The combination of patterns and colors adds visual interest while maintaining a cohesive overall look. This is particularly effective in living rooms where you want holiday cheer without overwhelming the space.
In your hallway gallery wall, these frames can be incorporated into existing displays or used to create a new holiday-themed arrangement. They add color and pattern to otherwise neutral spaces. In your dining room, framed gift wrap art creates a festive atmosphere perfect for holiday dinners and gatherings. The art provides visual interest without competing with food or table settings.
In your home office, these frames add festive motivation during the busy holiday season. They provide visual breaks from work while maintaining a professional appearance. The key is choosing papers and frames that feel appropriate for your workspace while still providing holiday cheer.
Christmas Potpourri Jar Gifts: Heartfelt and Homemade
These jars look beautiful and double as thoughtful, inexpensive gifts that make any home smell heavenly. Creating potpourri is surprisingly simple and allows you to customize scents and appearances to match your preferences or those of your gift recipients. The combination of visual beauty and delightful fragrance makes these jars perfect for both decoration and gifting.
The process of creating potpourri involves combining dried natural materials with essential oils or spices to create long-lasting fragrance. Unlike store-bought potpourri, homemade versions allow you to control every element, from scent strength to visual appearance. You can create potpourri that matches your personal style or that of your gift recipients perfectly.
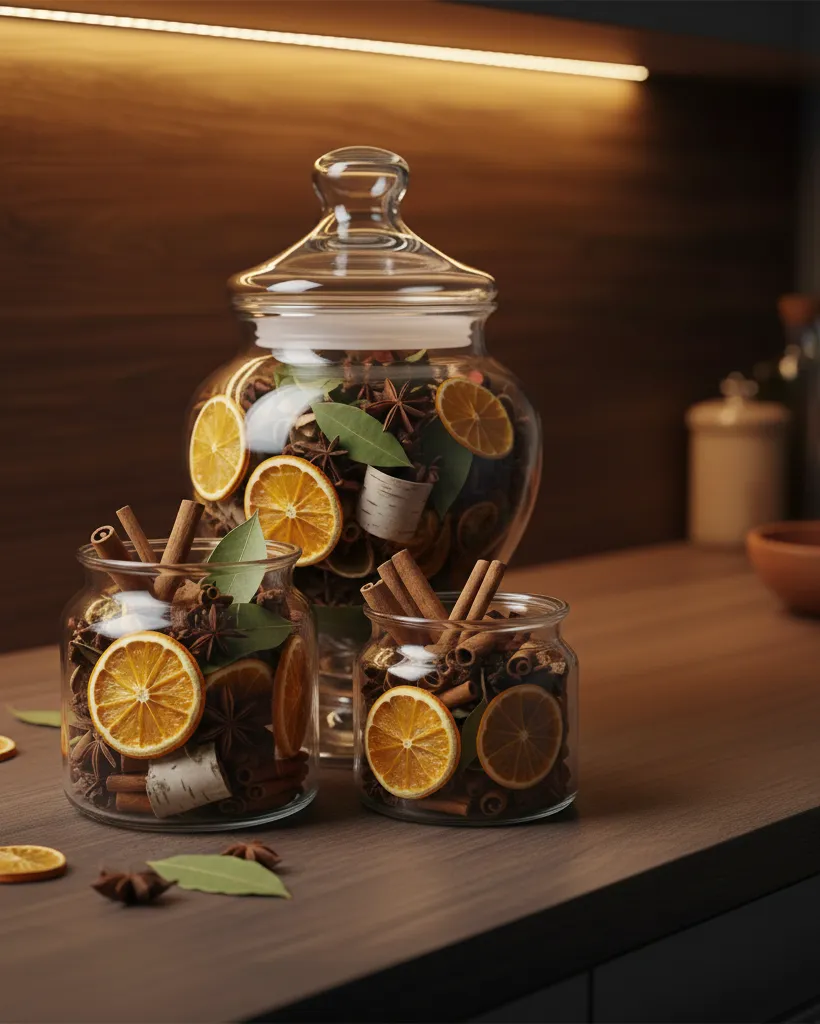
To create Christmas potpourri, start by gathering dried materials like orange slices, cinnamon sticks, cloves, star anise, and dried flowers or herbs. Combine these materials in proportions that appeal to you, keeping in mind both visual appearance and scent. Add a few drops of essential oils like cinnamon, orange, or pine to enhance the fragrance. Mix everything together gently to distribute scents and colors evenly. The Good Housekeeping crafting experts recommend using a ratio of 2 parts base materials to 1 part accent elements for balanced potpourri.
Fill your jars with the potpourri mixture, leaving some space at the top for visual appeal. You can layer materials for a more structured look or mix them for a more organic appearance. Seal your jars with lids to preserve fragrance, or leave them open for immediate scent release. Add decorative labels or ribbons to make them even more gift-worthy.
Where to Use Christmas Potpourri Jars
On kitchen counters, potpourri jars add both decoration and fragrance to busy spaces. They’re particularly effective in kitchens where cooking odors can benefit from natural, pleasant scents. The visual beauty of the jars adds decorative interest while the fragrance enhances the overall atmosphere. Choose locations where the jars won’t be in the way of food preparation but where they can be appreciated.
As guest bedroom welcome gifts, potpourri jars create a thoughtful, personal touch that makes visitors feel special. The combination of visual beauty and pleasant fragrance creates a welcoming atmosphere that guests will remember. Place them on bedside tables or dressers where they can be easily seen and appreciated.
On bathroom shelves, potpourri jars add both decoration and natural air freshening. They’re particularly effective in guest bathrooms where you want to create a welcoming, pleasant atmosphere. The natural materials and scents feel more luxurious and thoughtful than commercial air fresheners.
Under the tree as handmade presents, potpourri jars represent the perfect combination of beauty, thoughtfulness, and affordability. They show recipients that you’ve put time and care into their gifts while providing something they can use and enjoy throughout the holiday season and beyond. Package them beautifully with ribbons, tags, or decorative boxes to enhance their gift appeal.
Tips for Creating Cohesive DIY Christmas Décor
When decorating with multiple DIY projects, creating a cohesive look throughout your home is essential. This doesn’t mean everything must match perfectly, but rather that elements should work together harmoniously. Start by choosing a color palette that complements your existing décor. This might be traditional red and green, modern neutrals, or something entirely unique to your style. Interior design principles from Apartment Therapy emphasize the importance of maintaining visual flow while allowing individual pieces to shine.
Consider the materials you’re using across different projects. Natural materials like wood, paper, and dried fruits work beautifully together and create a cohesive, organic feel. Mixing too many different material types can create visual chaos. Similarly, consider the scale of your decorations,mixing very large and very small elements can work, but requires careful placement to maintain balance.
Think about the overall mood you want to create. Do you want a calm, peaceful atmosphere or something more vibrant and energetic? Your DIY project choices should support this mood. For example, soft paper snowflakes and neutral colors create calm, while bright colors and bold patterns create energy. Choose projects that align with your desired atmosphere.
Don’t forget about lighting when planning your DIY décor. Many projects work beautifully with added illumination, whether from candles, fairy lights, or natural light. Consider how your decorations will look in both daylight and evening light. Some projects, like paper snowflakes and mason jar lanterns, are particularly enhanced by proper lighting.
Budget-Friendly Tips for DIY Christmas Decorations
Creating beautiful DIY Christmas decorations doesn’t require a large budget. With some creativity and smart shopping, you can transform your home for very little money. Start by taking inventory of materials you already have at home. Paper, string, jars, and other basic supplies are often already in your possession, waiting to be repurposed for holiday projects.
Shop at dollar stores, thrift stores, and discount retailers for materials. Many craft supplies are available at these locations for a fraction of specialty store prices. Don’t overlook natural materials that might be available in your own yard or neighborhood. Pinecones, branches, and other natural elements are free and add beautiful, organic texture to your projects.
Consider buying materials in bulk when possible. If you’re making multiple decorations, buying larger quantities often reduces per-item costs. Share materials with friends or family members who are also crafting, splitting costs and reducing waste. This approach makes projects more affordable while creating opportunities for social connection.
Repurpose items you already own rather than buying new. Old frames can be painted and used for gift wrap art. Mason jars from your pantry can become lanterns. Scraps of fabric or ribbon can be incorporated into various projects. The key is looking at your existing possessions with fresh eyes, seeing potential where you might have seen only everyday items.
Safety Considerations for DIY Christmas Decorations
When creating DIY decorations, safety should always be a priority. Many projects involve materials that require careful handling, from hot glue guns to sharp scissors. Always work in well-lit, uncluttered spaces where you can focus on your projects without distractions. Keep tools organized and out of reach of children and pets when not in use.
If using candles in your decorations, always prioritize safety. LED candles provide the same beautiful glow without fire risk, making them ideal for homes with children, pets, or concerns about open flames. If you must use real candles, never leave them unattended and ensure they’re placed on stable, non-flammable surfaces away from flammable materials. The National Fire Protection Association provides comprehensive guidelines for safe holiday decorating practices.
When working with natural materials, be aware of potential allergens or irritants. Some people are sensitive to certain types of wood, essential oils, or other natural elements. If creating decorations for others, consider asking about allergies or sensitivities. This is especially important for potpourri and other scented decorations.
Store your DIY decorations properly to ensure they last for multiple seasons. Most paper decorations should be stored flat or in protective containers to prevent crushing. Natural materials should be stored in dry locations to prevent mold or deterioration. Taking care of your decorations ensures you can enjoy them for years to come.
Making DIY Decorations a Family Tradition
DIY Christmas decorations offer wonderful opportunities for family bonding and tradition-building. Many projects in this guide are suitable for children, making them perfect for family crafting sessions. These activities create memories that last far beyond the holiday season, becoming cherished traditions that families return to year after year.
When crafting with children, choose age-appropriate projects and provide proper supervision. Simple projects like paper snowflakes and wood bead ornaments are perfect for younger children, while more complex projects can challenge older kids and teens. The key is ensuring everyone feels included and successful, regardless of skill level.
Consider making DIY decorations an annual tradition, perhaps on a specific day or weekend each year. This creates anticipation and makes the activity feel special and meaningful. You might even create variations of the same projects each year, documenting how skills and styles evolve over time. These decorations become time capsules of family memories and growth.
Don’t worry about perfection when crafting with family. The beauty of DIY decorations lies in their handmade, personal nature. Slight imperfections add character and remind you of the time spent together. Focus on the process and the memories being created rather than achieving flawless results.
This season isn’t about perfect decorations or expensive pieces. It’s about creating a home filled with warmth, connection, and intention. Handmade décor reminds us to slow down, savor the moment, and bring beauty into our spaces with our own hands. Whether you’re crafting alone, with family, or for friends, each DIY piece becomes a memory. Each project becomes part of your story.
As these decorations fill your home with soft light, natural textures, and cozy charm, you’ll feel the magic that only a handmade Christmas can bring. The time and care you invest in creating these decorations will be evident in every detail, making your home feel truly special during the most magical season of the year.
Next Step: Ready to start creating? Choose one project that speaks to you and gather your materials. Once you’ve completed your first DIY decoration, you’ll understand why handmade décor feels so special. For more holiday inspiration and detailed tutorials, explore our complete collection of Christmas Tree Themes Ideas . If you’re looking for more natural decoration inspiration, check out our guide to creating a christmas garland that brings the outdoors inside beautifully.


