Wood slat walls are everywhere right now, and for good reason. They add warmth, texture, and a kind of quiet architectural detail that painted walls simply can’t match. But most of the versions you see online fall into one of two traps: they look like a sauna, or they look like a showroom. Neither belongs in a real home.
The good news is that neither trap is hard to avoid once you understand what makes these walls work in practice. This is about wood slat walls for living rooms specifically, with the TV wall as the most common and most rewarding application. By the end, you’ll know whether it’s right for your space, what it actually costs, and how to do it without hiring anyone.
Why Wood Slats Work Better Than Solid Paneling in Most Living Rooms
Solid wood paneling covers the wall completely. Slats don’t. That gap between each slat is doing more work than it looks like.
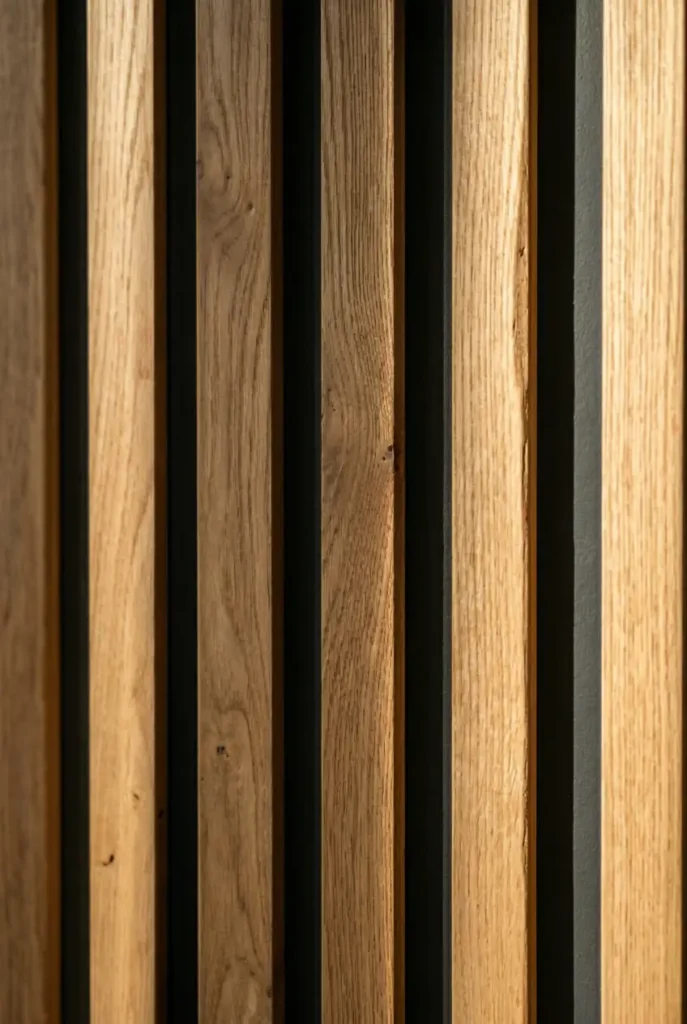
First, the gaps create shadow lines. Those lines change with the light throughout the day, which means the wall looks different at 9am than it does at 7pm. That’s what gives slat walls their texture and depth. A solid panel, by contrast, looks the same at all times. It’s flat in a way that slats never are.
Second, the gaps reduce visual weight. A full wall of solid dark wood in a standard living room can feel oppressive. The same wall in slats, with the original wall color visible between them, reads as lighter and more deliberate. You get the warmth of wood without the heaviness of a full wood interior.
Third, slats are more forgiving for DIY. Solid paneling requires precise cutting and flush joins at every edge. Slats are individual pieces. If one cut is slightly off, the next slat covers the gap. That makes the whole process much more accessible for a first-time install.
The Proportions That Make or Break the Look
This is where most DIY slat walls go wrong. Not the material. Not the color. The spacing.
Too narrow a gap and the wall reads as solid. You lose the shadow lines and the lightness that makes slats distinctive. Too wide a gap and the wall looks unfinished, like you ran out of wood halfway through.
The sweet spot for most living rooms: slats between 1.5 and 2.5 inches wide, with gaps between 0.75 and 1.5 inches. That ratio keeps the wood dominant while preserving the rhythm of the lines. As a general rule, the gap should be roughly half the width of the slat. So a 2-inch slat pairs with a 1-inch gap. A 1.5-inch slat pairs with a 0.75-inch gap.
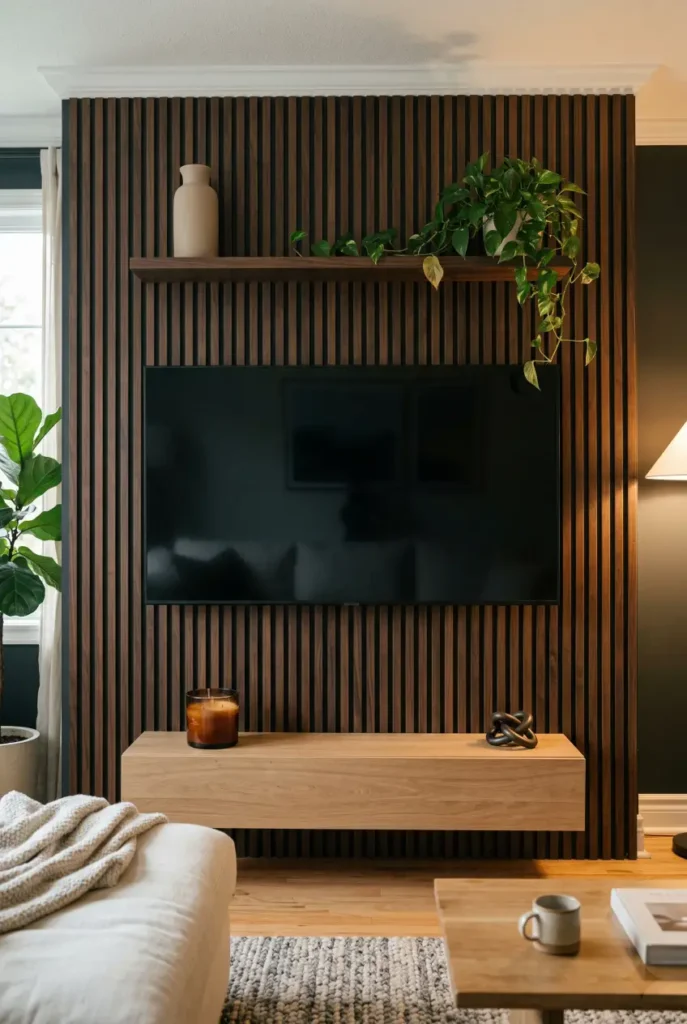
Height matters too. Full-height slats, running floor to ceiling, make the room feel taller and the wall feel intentional. Half-height slats, stopping at chair rail level or two-thirds up the wall, read as a different treatment entirely, closer to wainscoting. Both are valid, but they create very different effects. For a TV wall specifically, full height almost always works better because it frames the TV rather than cropping it.
Light vs. Dark: Choosing the Right Tone for Your Space
The tone of your slats will interact with your natural light in ways that are worth thinking through before you buy anything.
Light oak and natural pine tones work best in rooms with moderate to low natural light. They add warmth without adding visual weight, and they keep the space feeling open. In a very bright, south-facing room, light slats can wash out slightly and lose their definition. But in a north-facing room or an apartment with limited windows, they’re often the right call.
Medium walnut and warm brown tones are the most universally flattering option. They have enough depth to create strong shadow lines and enough warmth to complement almost any sofa color or rug tone. If you’re uncertain, this is the version worth copying.
Dark ebony and blackened wood tones make a strong statement. They work beautifully in rooms with good natural light and light-colored furniture, where the contrast creates drama without feeling heavy. In low-light rooms with dark furniture, they can feel like too much. That said, dark slats behind a TV have one specific advantage: they reduce the contrast between the screen and the wall in the same way dark paint does, which means the TV blends in better when it’s off.
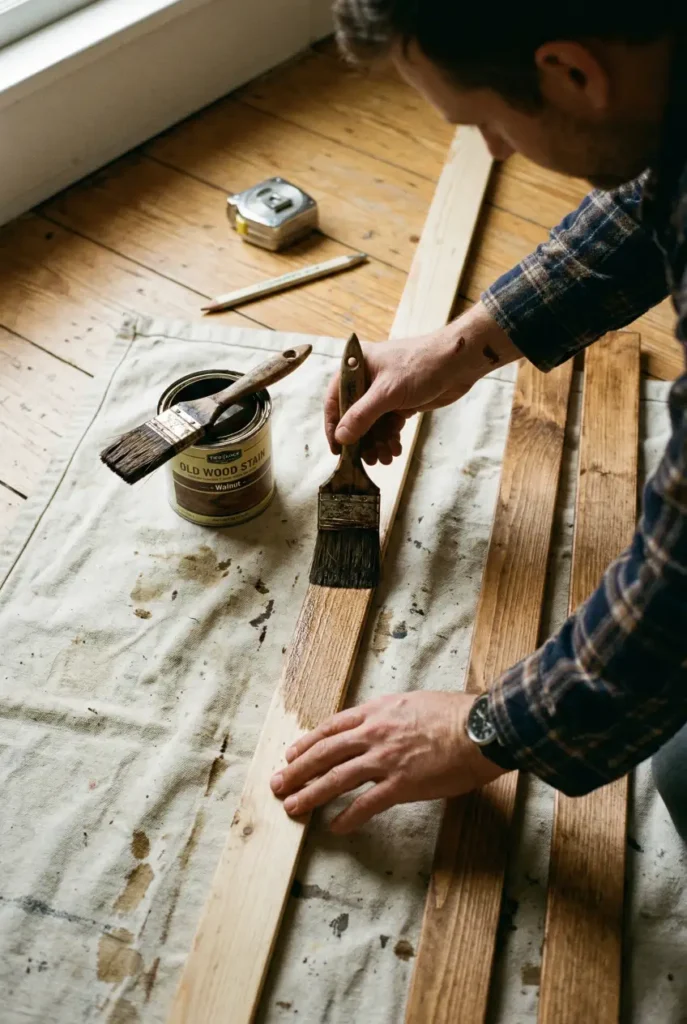
One thing worth knowing: you don’t have to buy pre-colored slats. Standard pine slats are inexpensive and take stain extremely well. Buying raw and staining yourself gives you access to any tone you want at a fraction of the cost of pre-finished panels.
The DIY Version: What It Actually Costs and How Long It Takes
Let’s be specific, because the internet is full of vague estimates that don’t help anyone plan a real project.
For a standard 10-foot-wide, 8-foot-tall TV wall using raw pine slats from a home improvement store:
- Materials: Pine furring strips (roughly $1.50 to $2.50 per 8-foot length) plus construction adhesive and finishing nails. For a 10×8 wall at 2-inch slats with 1-inch gaps, you need approximately 40 strips. Total material cost: $80 to $120.
- Stain or paint: One quart covers the slats easily. Add $15 to $25 depending on the product.
- Tools needed: A miter saw or circular saw, a level, a nail gun (optional but strongly recommended), a tape measure, and sandpaper. If you don’t own a nail gun, most home improvement stores rent them for around $40 a day.
- Time: Honest estimate for a first-time install: one full day. Two to three hours of prep including staining or painting the slats before they go up, and four to five hours of installation. Having a second person makes the installation significantly easier.
Total realistic budget including tools rental: $150 to $200 for the whole wall. Pre-made slat panel systems from retailers will run $300 to $600 for the same wall, depending on the brand and material. They’re faster to install, but the DIY version gives you more control over spacing, tone, and finish.
I’m not going to recommend specific brands here. The material matters more than the label. What you’re looking for is straight, knot-free wood with consistent thickness. Check each piece before you buy it.
The Mistakes That Make It Look Cheap
A wood slat wall done wrong is worse than no treatment at all. Here’s what to watch for.
Uneven spacing. This is the most visible error and the hardest to unsee once you notice it. Before you install a single slat, measure the wall precisely and calculate your spacing so the gaps at each end of the wall are equal. Starting from the center of the wall and working outward guarantees symmetry. Starting from one side and hoping for the best does not.
Slats that don’t reach the floor. Stopping the slats a few inches above the floor to avoid cutting looks unfinished. Run them to the floor or install a thin baseboard at the bottom that gives the wall a clean termination point. The floating-above-the-floor look is almost never intentional.
Not painting the wall behind first. The wall color visible in the gaps is part of the design. If you install slats over unpainted drywall or the wrong color, those gaps will betray you. Paint the wall behind a dark tone, close to the slat color or darker, before any slat goes up. That way the gaps read as shadow rather than as visible wall.
Mixing wood tones accidentally. If your floors are light oak and your slats are also light oak, the wall and floor can merge visually in a way that makes the room feel smaller. A slight contrast between slat tone and floor tone, not dramatic, just distinct, gives each surface its own presence.
What Goes Around and Above the TV on a Slat Wall
The slats do most of the decorative work. Because of that, the TV wall needs less styling than a painted wall does.
The media console below the TV should be simple. A floating console in a complementary wood tone or a painted finish works better than a large entertainment unit, which would compete with the texture of the slats. Keep it low, keep it clean.
The space above the TV on a slat wall follows slightly different rules than on a painted wall. Because the wall is already textured, art can look busy in that position. A single large-format piece works if the framing is simple. A floating shelf with two or three objects works well because it creates a horizontal break in the vertical rhythm of the slats. What doesn’t work is a cluster of small objects or a gallery arrangement, both of which fight with the slat pattern rather than complementing it.
For the full breakdown of sizing, heights, and object choices for the space above the screen, the guide on what to put above your TV covers every option in detail.
On the color side: if you’re pairing slats with a painted section of wall elsewhere in the room, the guide on what color to paint behind your TV gives you the specific tones that work alongside wood treatments without competing.
Renter-Friendly Version: Does It Exist?
Yes. With one significant caveat.
The fully removable version uses construction adhesive rated for wood-to-drywall application, with no nails or screws. The slats go up with adhesive alone. They stay put for years. The problem comes at the end: adhesive removal from drywall is messy, and you will almost certainly need to skim-coat and repaint the wall when you move out.
If your landlord allows painting, that’s probably fine. Most security deposit disputes over wall damage involve holes, not adhesive marks. But check your lease before committing.
The cleaner renter-friendly option is a freestanding slat panel that leans against the wall. Several furniture brands sell these as room dividers or decorative panels. They don’t look quite as integrated as a wall-mounted version, but they’re zero-commitment and genuinely portable.
Peel-and-stick slat panels also exist. The honest assessment: most of them look like what they are. The exceptions are the thicker, higher-quality versions with real wood veneer faces. If you go that route, read reviews specifically about how they look in person, not in product photos.
For a standard 10×8 foot wall using raw pine furring strips, materials run $80 to $120. Add stain or paint for $15 to $25, and tool rental if needed for around $40. Total realistic budget: $150 to $200. Pre-made panel systems for the same wall run $300 to $600 depending on brand and material.
Yes, with the right prep. The installation itself is repetitive rather than technically complex. The two skills that matter most are measuring accurately and cutting straight. A miter saw makes the cuts easy. A chalk line or laser level makes the spacing consistent. Most first-timers complete a standard TV wall in a single day, and the result is genuinely professional-looking when the spacing is done carefully.
The gap should be roughly half the width of the slat. A 2-inch slat works with a 1-inch gap. A 1.5-inch slat works with a 0.75-inch gap. That ratio keeps the wood dominant while preserving the shadow lines that give slat walls their texture. Always paint the wall behind a dark color before installing, so the gaps read as shadow rather than as visible drywall.
It can be, using construction adhesive instead of nails. The adhesive holds well but requires surface repair on removal. The cleaner option for renters is a freestanding slat panel or a peel-and-stick system with real wood veneer facing. Check your lease before any wall treatment, even adhesive-only installations.
Raw wood gives you more control over tone, spacing, and finish at a lower cost. Pre-made panels are faster and more consistent, which matters if precision cutting isn’t something you’re comfortable with. For a TV wall where the proportions and spacing are critical, raw wood with careful planning tends to produce a more tailored result. Pre-made panels work better for larger walls where speed matters more than customization.
Vertical slats are the stronger choice for a TV wall in most rooms. They draw the eye upward, which makes ceilings feel higher, and they create a natural frame around the TV that horizontal slats don’t. Horizontal slats work well for half-wall treatments or in rooms with very high ceilings where you want to add width rather than height. For standard 8-foot ceiling rooms, vertical is almost always the better call.

")
")