There’s a specific kind of living room that stops you when you walk in. The walls have detail. Structure. Something that feels considered rather than decorated. Most of the time, the secret isn’t expensive furniture or a renovation. It’s picture frame molding. A few strips of trim, some paint, and a weekend. That’s genuinely all it takes.
Picture frame molding is one of those treatments that looks custom and expensive because it is, in fact, architectural. It’s been used in formal interiors since Georgian England. But the DIY version, using standard trim from any home improvement store, costs between $50 and $150 for a full wall. The result is indistinguishable from the real thing once it’s painted.
This article focuses on the living room TV wall specifically, because that’s where the treatment does its most impressive work. However, the same principles apply to any wall in the room.
What Picture Frame Molding Actually Is (And What It Isn’t)
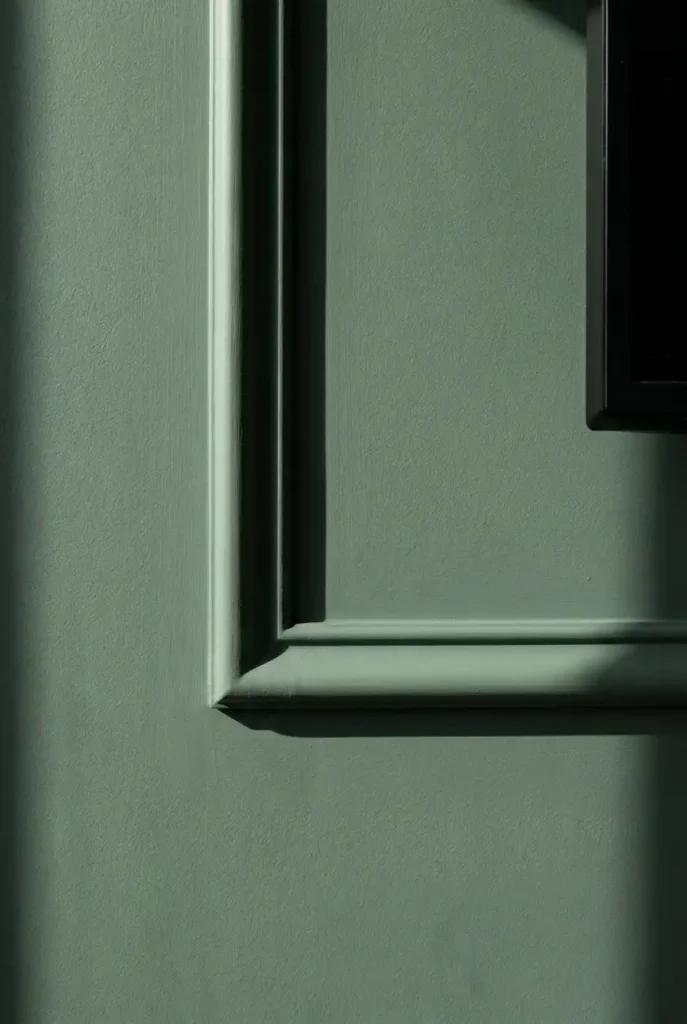
Picture frame molding, also called panel molding or box trim, is simply strips of decorative trim applied to the wall in rectangular or square shapes. Those shapes resemble picture frames, hence the name. The trim sits proud of the wall surface by a small amount, usually half an inch to three quarters of an inch, and creates shadow lines that add depth and visual interest.
It’s worth being clear about what this treatment is not. It’s not wainscoting, which covers the lower half of a wall with flat panels between the trim. And it is not board and batten, which uses vertical strips at regular intervals. Picture frame molding is purely surface-applied decorative trim. Nothing structural, nothing load-bearing, nothing that changes the wall itself.
That distinction matters because it means the treatment is almost entirely reversible. The trim comes off. The nail holes fill. The wall goes back to what it was. That makes it one of the few genuinely architectural upgrades that doesn’t require a contractor or a long-term commitment.
Why It Works So Well on a TV Wall
Most TV walls have the same problem: one large, featureless rectangle of wall with a screen stuck to it. The wall has no structure of its own, so the TV dominates by default. There’s nothing else for the eye to land on.
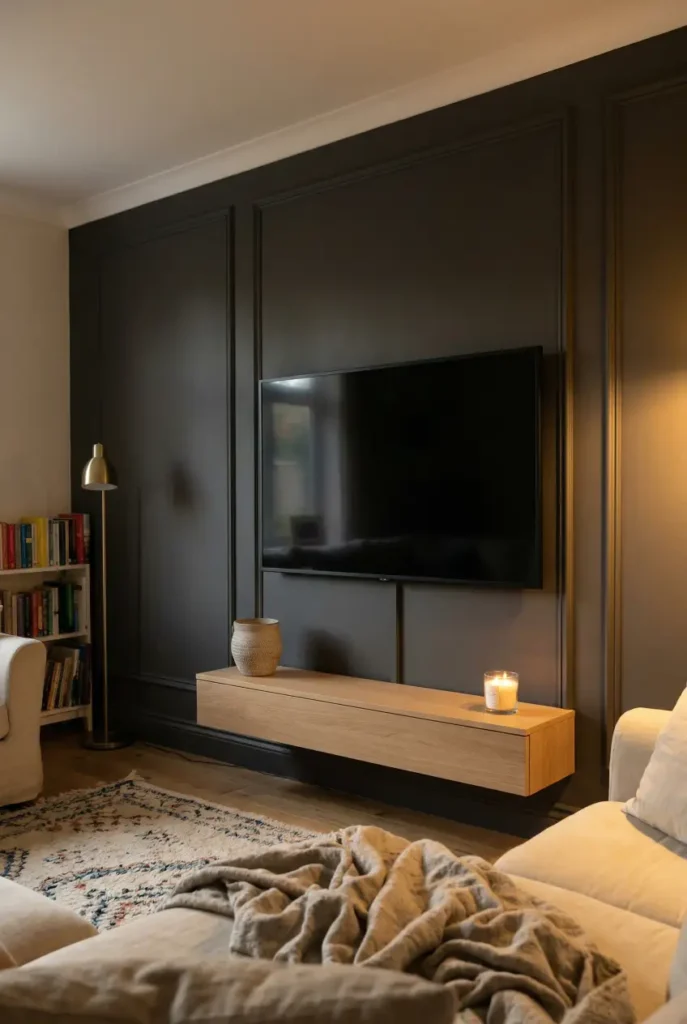
Picture frame molding solves this by giving the wall its own geometry. Suddenly the TV is mounted within a visual framework, not floating on a blank surface. The molding creates context around the screen without competing with it. When the TV is on, you don’t notice the molding. When it’s off, the wall looks finished and intentional on its own.
This is also why the treatment pairs so well with paint. A TV wall with picture frame molding and a strong paint color, even the same color as the rest of the room but in a deeper tone, looks like something a designer specified. The molding gives the paint a reason to be there. Without the molding, the same paint is just an accent wall. With it, the whole thing reads as architectural detail.
For the specific paint colors that work best in this application, the guide on what color to paint behind your TV covers the tones that consistently perform well alongside molding treatments.
The Layout Decisions (Get These Right Before You Buy Anything)
The proportions of your molding layout matter more than the molding itself. A well-proportioned layout with cheap trim looks better than a poorly proportioned layout with expensive trim. Every time.
How Many Panels for a TV Wall?
For a standard 10 to 12 foot wide TV wall, three panels is almost always the right answer. One large central panel that frames the TV, flanked by two narrower panels on each side. This arrangement is symmetrical, which suits the TV wall because the TV itself is symmetrical.
Two panels work on narrower walls, roughly 8 feet or less. Four panels can work on wider walls, but they start to feel busy if the TV wall also has a console and styling below it. When in doubt, go with fewer, larger panels rather than more, smaller ones. Larger panels feel more architectural. Smaller panels feel more decorative, and the difference is significant.
Panel Height: Full Wall or Two-Thirds?
Two options exist here. Full-height panels, running from baseboard to ceiling, make the room feel taller and the treatment feel more substantial. Two-thirds height panels, stopping below a chair rail or at a consistent point around 60 to 72 inches from the floor, create a more traditional wainscoting-adjacent look.
For a TV wall specifically, full height is almost always the stronger choice. It frames the mounted TV naturally within the vertical composition. Two-thirds height tends to crop the TV awkwardly, depending on mount height.
The Spacing Rule
The gap between the outer edge of the molding and the wall edge, baseboard, ceiling, or adjacent panel, should be consistent on all sides of each panel. That consistency is what makes the layout look planned rather than approximate.
A gap of 3 to 5 inches between panels and between the outer panels and the wall edges works well for most living room walls. On taller walls, 4 to 6 inches. The specific number matters less than the consistency. Measure twice, mark with painter’s tape before cutting anything, and stand back to evaluate the proportions before a single piece of trim goes up.
The Materials: What to Buy and What to Skip
Standard base cap molding from Lowe’s or Home Depot is the classic choice for picture frame molding. It’s inexpensive, widely available, and has a simple profile that works in both traditional and modern rooms. A typical TV wall project uses between 60 and 90 linear feet of trim depending on panel size and count. At $0.80 to $1.50 per linear foot, total trim cost for most TV walls runs $50 to $135.
Beyond base cap, a few other profiles work well for this treatment. Lattice molding gives a flatter, more minimal look that suits contemporary rooms. Colonial stop molding has a slightly more pronounced profile for a more traditional result. Reed molding, with its fluted face, adds a bit more texture and works beautifully in maximalist or layered interiors.
I’m not going to recommend specific brands here. The profile matters. The brand doesn’t, as long as the trim is finger-jointed pine or MDF and comes pre-primed. Pre-primed trim takes paint significantly better than raw wood and saves a step in the finishing process.
What you’ll also need: construction adhesive or liquid nails, a brad nailer (strongly recommended, though finish nails and a hammer work), wood filler, sandpaper, caulk, and paint. Total materials budget including all of the above: $100 to $180 for a standard TV wall.
Installation: The Honest Step-by-Step
This is a beginner-friendly project. Genuinely. The cuts are all 45-degree miters, which any miter saw handles automatically. The installation is repetitive rather than technically complex. A first-timer can complete a standard TV wall in a single day.
Here’s the sequence that works.
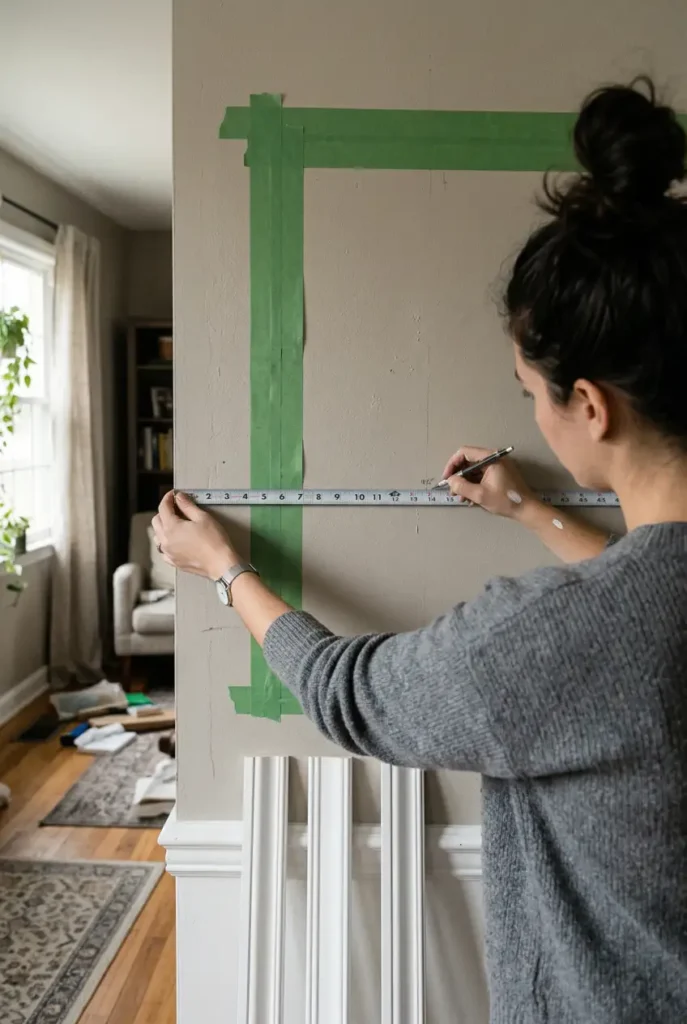
Step 1: Mark the layout on the wall. Use painter’s tape to outline each panel. Stand back, look at it from the sofa height, adjust until the proportions feel right. Do not skip this step. The tape costs nothing and saves the frustration of installed molding that looks wrong.
Step 2: Calculate and cut your pieces. Each panel requires four pieces of trim, cut at 45-degree miters on each end. Always measure the long edge of each piece. Cut all pieces for one panel before moving to the next, and label the back of each piece with its position.
Step 3: Apply adhesive and nail. Run a thin bead of construction adhesive along the back of each piece. Position precisely on your tape marks, then nail through the face of the trim with a brad nailer. Start with the top and bottom pieces of each panel, then fit the sides. That order lets you adjust the side lengths if needed.
Step 4: Fill, sand, and caulk. Fill nail holes with wood filler. Sand smooth when dry. Run a thin bead of paintable caulk along every edge where the trim meets the wall. This step is what makes the installation look professional. Without it, the trim edges show as gaps and the whole thing looks DIY in the wrong way.
Step 5: Paint. Two coats. Same color as the wall for the tone-on-tone look that reads as architectural detail. A contrasting color for a bolder, more graphic effect. The tone-on-tone approach is more versatile and more timeless. But the contrasting version photographs beautifully if Pinterest performance matters to you.
Same Color vs. Two Colors: Which Version to Choose
This is the most common question, and the answer depends on what job you want the molding to do.
Same color, painted wall and trim together in one continuous tone, creates subtle depth through shadow lines alone. The molding is visible because of the shadows it casts, not because of color contrast. This version is quieter, more sophisticated, and more universally livable. It works in traditional rooms, contemporary rooms, and everything between. It also ages better, because it’s not dependent on a trend.
Two colors, meaning a contrasting trim color against the wall, creates a more graphic result. White trim on a dark wall is the classic version. It’s bold, it photographs well, and it creates very clear definition between the panels. The risk is that it can start to feel busy if the rest of the room also has a lot going on.
For a TV wall specifically, same color is usually the stronger choice. The TV itself already provides contrast. Adding contrasting molding on top of that creates three competing focal points: the TV, the molding lines, and the wall color. The same-color approach lets the TV remain the primary focal point while giving the wall architectural presence in a supporting role.
What Goes on the TV Wall Once the Molding Is Done
Less than you think.
A molding wall with a TV and a console is often enough. The molding provides the visual interest. Adding a gallery of objects above the TV, a floating shelf loaded with things, and a console covered in accessories can make the wall feel overworked. The molding is already doing the decorative labor. Let it.
If you want something above the TV, one piece of art or one simple shelf with two objects works well. The guide on what to put above your TV covers the sizing and spacing rules that apply specifically on a wall with existing architectural detail.
For the console below: keep it simple. A floating shelf or a low, clean-lined console. The wall is working hard enough.
For a standard 10 to 12 foot TV wall, materials run $100 to $180 total. That includes trim at $50 to $135 depending on linear footage, plus construction adhesive, wood filler, caulk, sandpaper, and paint. A brad nailer rental adds roughly $40 if you don’t own one. The finished result is genuinely indistinguishable from custom millwork once it’s painted.
Yes. The cuts are all 45-degree miters, which any miter saw handles with a single setting adjustment. The installation itself is methodical rather than technically demanding. The most important skill is patience with the layout planning stage before any trim goes up. Most first-timers complete a standard TV wall in one full day, and the caulking and painting can be done the following morning.
With caution. The trim requires nails or adhesive, both of which leave marks on removal. If your landlord allows painting, they often allow this treatment with the understanding that you’ll fill and paint on the way out. However, adhesive-only installation with no nails is a cleaner rental option and holds well on smooth, primed walls. Check your lease before starting.
For a TV wall, same color almost always works better. The TV already provides contrast. Tone-on-tone molding gives the wall architectural depth through shadow lines alone without adding a third competing element. Contrasting trim looks bold and photographs well, but it can make the TV wall feel busy in daily use. Start with same color and live with it. You can always paint the trim a contrasting tone later.
One full day for a standard TV wall, including layout planning, cutting, installation, and initial fill. Caulking and painting are best done the following day once the filler is fully dry. Budget two days total for a result you’re happy with rather than rushing the finish work, because the caulking and painting stages are what separate a professional-looking result from a DIY-looking one.

")
")